Visual Basic Tutorial - Getting Started
We are going to use a program called Visual Studio to create programs and games. To do this, we need to learn a programming language. There are many different languages to pick from but to keep things simple at first, we will be learning Visual Basic.NET (Pronounced “Visual Basic DOT Net”). Visual basic or “VB” is a great beginner’s language because it reads similar to English, and because we can still use visual elements like buttons and images.
The plan
Our first project is going to be a basic fun little prank program to make sure everything is installed and working, as well as starting us into programming. First, we will list what we want to achieve.
- A button on the screen
- When we try to click it, it moves away
- To make it extra annoying, it will change colour each time it moves.
- There’s probably even more ways to make it better for after this
Step 1 - Open the programming program
Our first step is to open Visual Studio Express 2012. This is going to be where we do most of our work now and in every lesson. The first time you open it might be quite slow. Eventually we want to get to this screen.
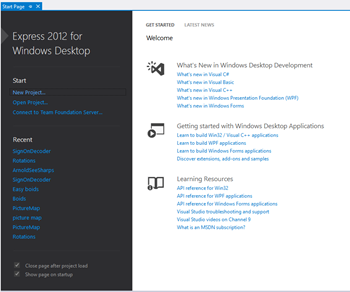
On the left side, click New Project.
For our very first project we aren’t going to change anything at all, so immediately click OK down the bottom to open a new blank project.
Step 2 - Running our first program
We have already made a program! We can see it already as the window on the screen with “Form1” written on it. Up the top, click Start ▶ to have our program run. It should pop up our Form1 window, and we can Minimize, Maximize, Resize and Close our program. Close it now.
This is actually a complete and total program. We can officially call ourselves application developers! But now let’s make it more interesting and actually DO stuff.
Step 3 - Adding a button
On the left hand side of the screen should be the word Toolbox. Click it now, and then click the pin at the top of the new Toolbox. If you can’t see it at all, Click the View menu up the top, and then Toolbox in the list, then the pin again. The image below should help with finding all these things in the top left corner of the screen
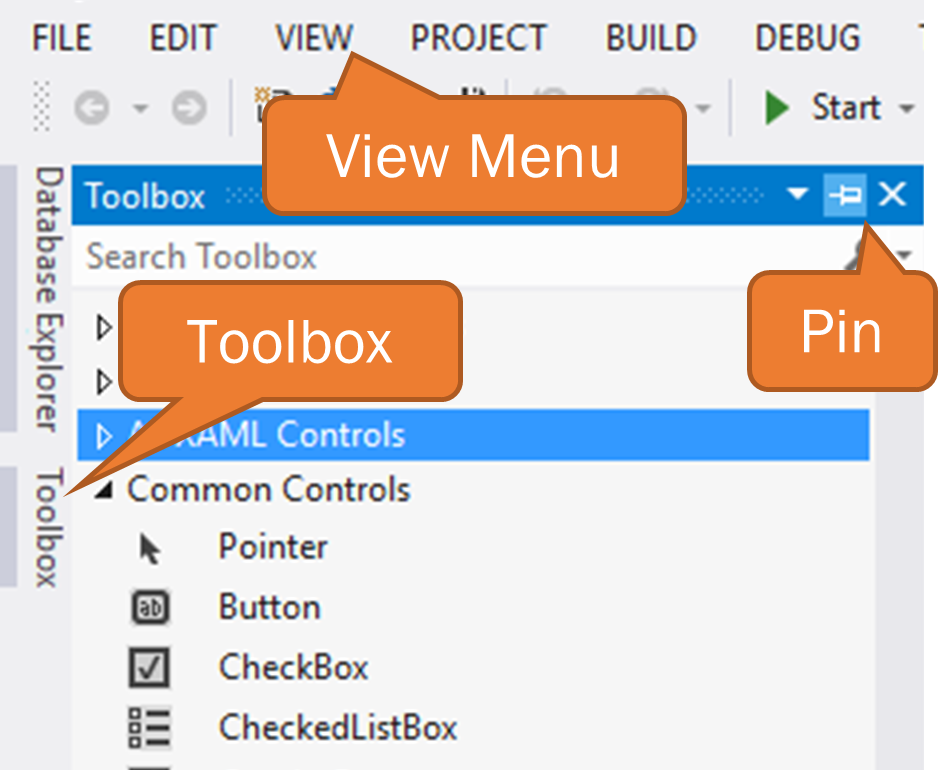
Whenever we want to add something we can see, the Toolbox is where we get it. Find the Button component in the toolbox, and drag one onto our Form1.
We use these components because they come ready to use. These buttons and other things are clickable, have text, highlight and have all normal button functions already coded. We could absolutely make our own. But we don’t have to!
Step 4 - Making the button do something
To program something on our program that we can already see, the easiest way is to double click it. Double click the button you just added. You’ll get taken to the code screen for Form1, and VB will automatically put you in between 2 lines about the Button, because that’s what we double-clicked on. It should look like this, maybe with some different colours
1
2
3
4
5
Public Class Form1
  Private Sub Button1_Click(sender As object, e As EventArgs) Handles Button1.Click

  End Sub
End Class
We will talk more about this code later, but for now, add the following line of code between Private Sub and End Sub then hit Enter
1
    Button1.Left += 10
VB is nice enough to fix spaces and capitals, you just need to spell things correctly. If you do, there won’t be any blue squiggles and VB will make everything neat.
Once you’ve written the code, Press Start ▶ again. Try clicking the button.
Worksheet - Step 4
- What happens when you click the button?
- What code would you change to make it faster?
- What code would you change to make it go the other way?
Step 5 - Other events
By double clicking the button, we got VB to make a “Click” event for the button. Whenever we click it, it will run the code in that event. There are literally hundreds of events that buttons can respond to. Now we will change the event to something else. Stop the program by closing Form1 or finding the Stop ■ button up the top. (It only has the square, no words)
You can’t edit a program while it’s running! It would be like trying to fix your car while going down the highway!
Then get back to the code (if you need to) by double-clicking on the button again.
At the top of the code window is two boxes. The left one is the thing we’re coding (It should say “Button1” at the moment), and the right one is the Event we’re coding. It should say The right side should say “Click”, because we’re coding the Click event of Button1.
Click on Click and find MouseMove. This event fires anytime the mouse moves while on top of the button. Copy your line of code from before into the new MouseMove event. When you’re done, your finished code should look like this. Don’t write the giant long lines that have sender written in it. For 99% of what we are doing, it’s easier to make the computer write it
1
2
3
4
5
6
7
8
9
Public Class Form1
  Private Sub Button1_Click(sender As object, e As EventArgs) Handles Button1.Click
    Button1.Left += 10
  End Sub

  Private Sub Button1_MouseMove(sender As object, e As EventArgs) Handles Button1.MouseMove
    Button1.Left += 10
  End Sub
End Class
Test out your program again.
Step 6 - Better movement
This is already a little annoying, but we want lots of annoying. Next step is to make it randomly move instead of consistently. We need to add one line to get a random number generator, then change our movement line. We’ll consider the random generator a bit of “Code magic” at this point and come back to it in a later lesson
Look up the top of your code for the two lines:
1
2
Public Class Form1
  Private Sub Button1_Click(sender ....
Between those lines, add the new one below so it looks like this:
1
2
3
Public Class Form1
  Dim r as New Random   'This line is new!
  Private Sub Button1_Click(sender ...blah blah blah...
Lastly, we need to update our line of code that moves the button. Find the MouseMove section, then change the code inside it from
1
2
  'OLD: Change this line
  Button1.Left += 10
to
1
2
  'NEW: Code should look like this
  Button1.Left = r.Next(1600)
And test your changes. If your button immediately vanishes, make sure to make your window bigger by clicking the Maximise button to make it fill the whole screen
Step 7 - Going up and down
We’re using this line of code to move the Left side of the button to a random number between 0 (left side of screen) and 1600 (near the right side). We can do the exact same thing by moving the Top side of Button1. We need to make the number smaller because the screen isn’t as tall as it is wide.
1
2
  Button1.Left = r.Next(1600)
  Button1.Top = n.Next(900)
Test it out, and make sure you Maximise your program to see it all
Wrapping up
The last things worth doing before moving on to the rest of this project is to make your button look nicer. Don’t worry about colours, because we’ll be changing them in code soon anyway. But changing the Font and Text of the button is worth doing. Go back to Design view (Look for [Design] in the tabs above your code), right click your button, and click Properties. You’ll have a big list in the bottom right.
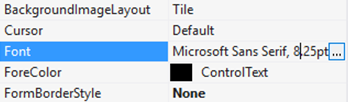
Look for Text and change it from "Button1" to something else like “Click Me!" Then look for Font, click it, then click the little ... that shows up. It will give you a screen to change the font and size. Once your button is done, move onto part two!